
How to add cross stitch patterns onto clothes, totes and linens.
Adding cross stitch patterns to your garments is a great way to add a personal touch to your already loved makes. With waste canvas, cross stitch patterns can be added to clothes, totes, linens, etc. Make the products yourself or add them to pre-made items. Either way, you'll find the reward of embellishing your items with a personal stitching journey.
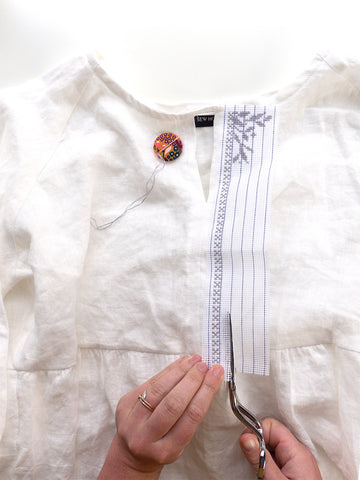
This photo tutorial is from my collaboration with Sew House 7. Intended for use on the Romey/Remy dress and top, this pattern fits perfectly onto the bodice.
Grab yourself a kit here, or just the pattern and materials.

Supplies needed:
Waste canvas, embroidery floss, needle (sharpness will depend on the material being stitched onto), and thread snips.

Cut your canvas to size. I like to cut about 1" wider than the pattern on all sides. Then baste or pin your waste canvas to the garment. Make sure not to catch the back of the garment when pinning in place.

Cut your thread to your preferred length and try a loop start for a seamless thread beginning.

Per the pattern, begin stitching at the top of the first row and work your first row of diagonals. Come back across the row with your second set of diagonals and watch your full stitches come to life.

At the end of your thread, tie a know and weave your thread tail into the back of your stitches to hide the ends.

Follow the pattern stitching down to the end of the bodice. Finish your pattern repeat at the seam line where the bodice meets the peplum.

The back of your stitching should be tidy and in line with the CF seam. Continue to check your alignment as you stitch to make sure the lines are parallel. Your thread tails should be woven and tucked behind the existing stitches. Clip any threads remaining and prepare for waste canvas removal.
Trim your waste canvas leaving approx. 5/8" allowance around the stitched areas.

Once trimmed down to size, spray your waste canvas with water to soften the fibers.

Grab a set of cosmetic or crafting tweezers to help pull out the canvas. You can also do this by hand, but I find it helpful to use tweezers.

Begin by removing the horizontal threads, then the vertical threads. The threads will be tough to pull at first, but the more you remove, the easier the remaining threads will follow.
Ready to dive in with even more instruction? There's a great video tutorial made in collaboration with Sew House 7 that walks you through even more details of using your waste canvas.